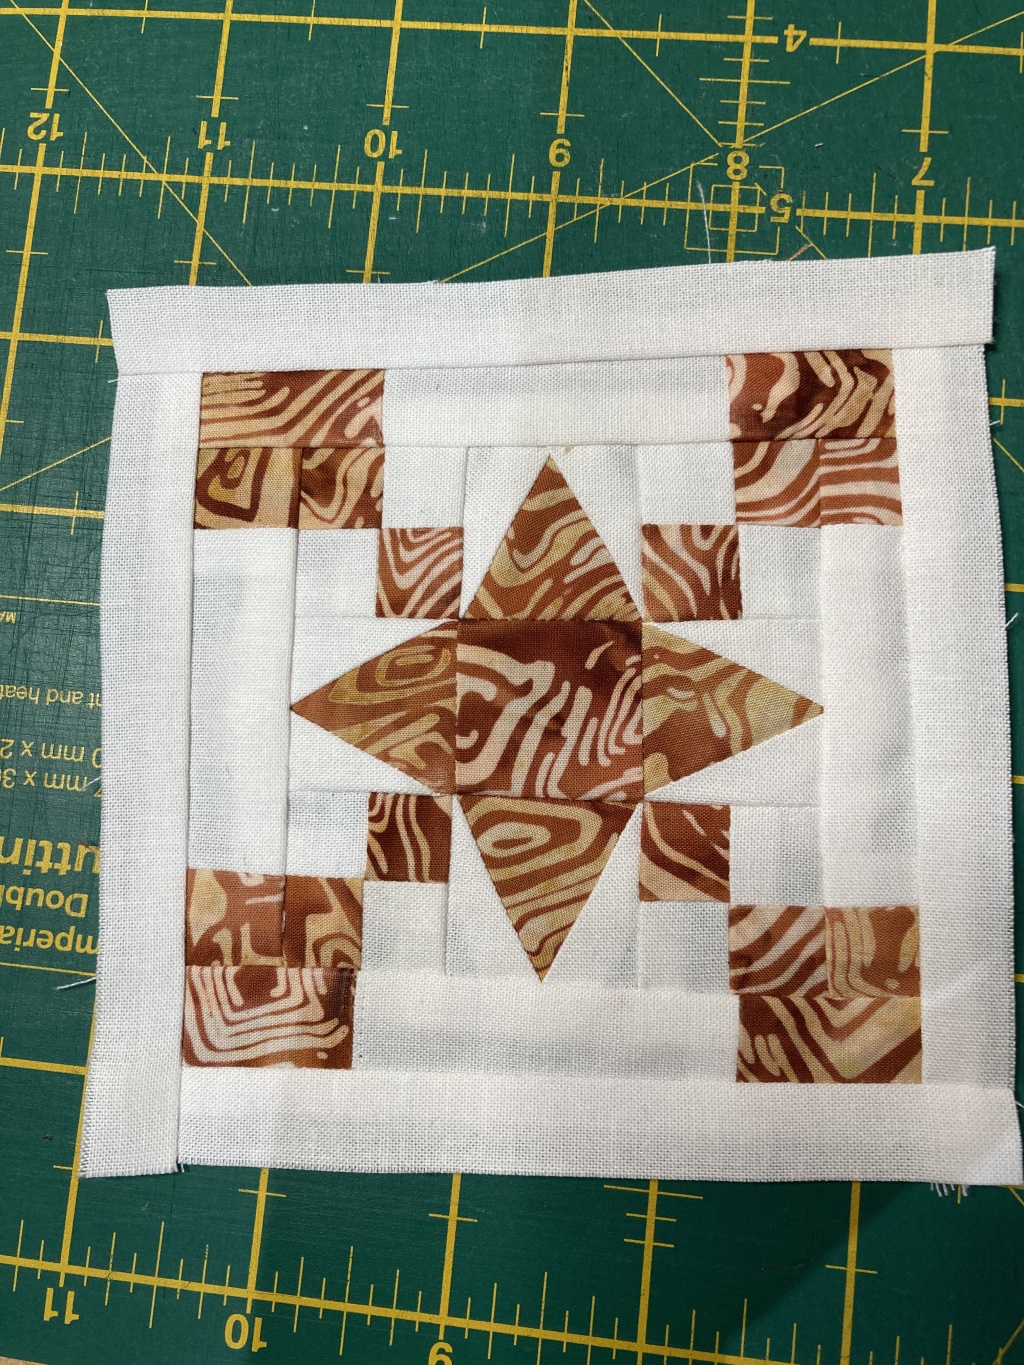
The joy of being able to sew and craft is the ability to make whatever you want to your colours and specifications. The downfall is that you then have to make it up yourself, easier said than done!
My husband is particularly fond of taking chocolate brioche rolls to work with him, he has one every time he is the office. We have been trying to reduce the use of single use plastics in our house, so I don’t want to be using cling film over them each day. I did make some cute ripstop velcro bags for his grapes but they cause the bread to go stale before he eats them. So back to the drawing board, and this is what I came up with.
I wanted to have a small a number of seams and gaps as possible and I wanted the zip to be on the front. Having the zip on the top would make it hard to avoid air gaps. I could have made a small box bag but that was getting a bit much just for some brioche. Instead I decided I would just bind the edges instead to make it easier and quicker. Plus that gave me some space for an interesting stitch pattern. Here’s how to make it.
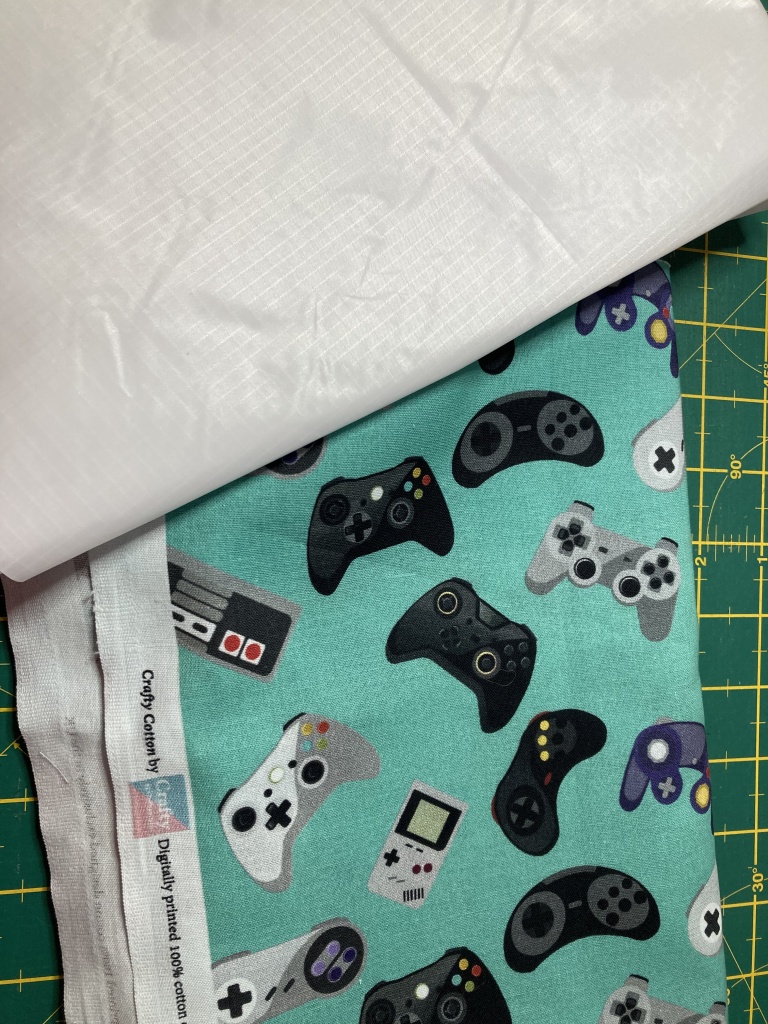

The size of your fabric and zips really depends on how big you want your bag, to get the sizes for mine I went and measured my brioche and then added 1′ – 1 1/2″ to the top and side. My fabric ended up being 7″ by 12″ which gives a nice size pouch for small food items. I’m using ripstop fabric as my lining fabric, as it is mostly water-repellent and easy to clean.
Materials needed:
-Outer fabric: 7″ x 12″ (or the size needed for your pouch) -Lining fabric: 7″ x 12″ (or the size needed for your pouch) -Zip: 7″ (or the size of the side you will have at the top of your pouch)
To start, cut and iron your fabric (don’t iron the ripstop it will warp). Take your zip and place it face down on top of your outer fabric (the back of the zip should be facing up). Do a basting stitch with a 1/8th inch seam. Next lay your lining fabric right side down on top of your zip, creating a sandwich with the zip in the middle. Stitch a 1/4 inch seam along the top of the sandwich. Watch out for the zip, stop and move it out the way if needed. If you are using a continuous zip with a cut edge be careful not to zip the zip straight off the edge.

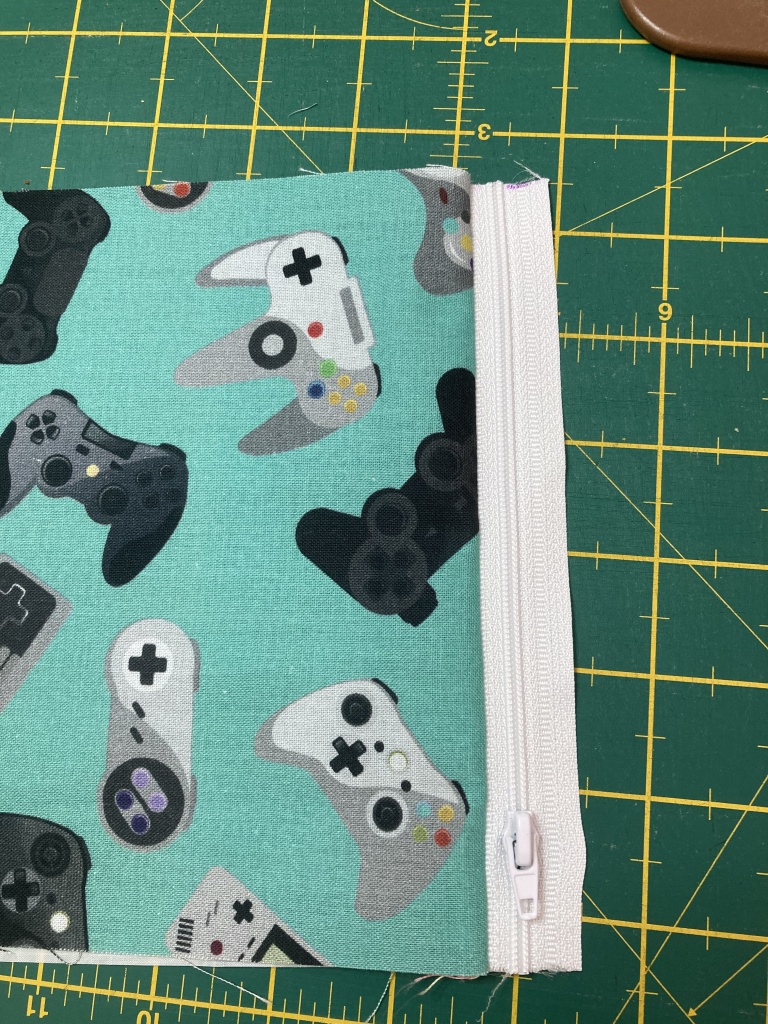
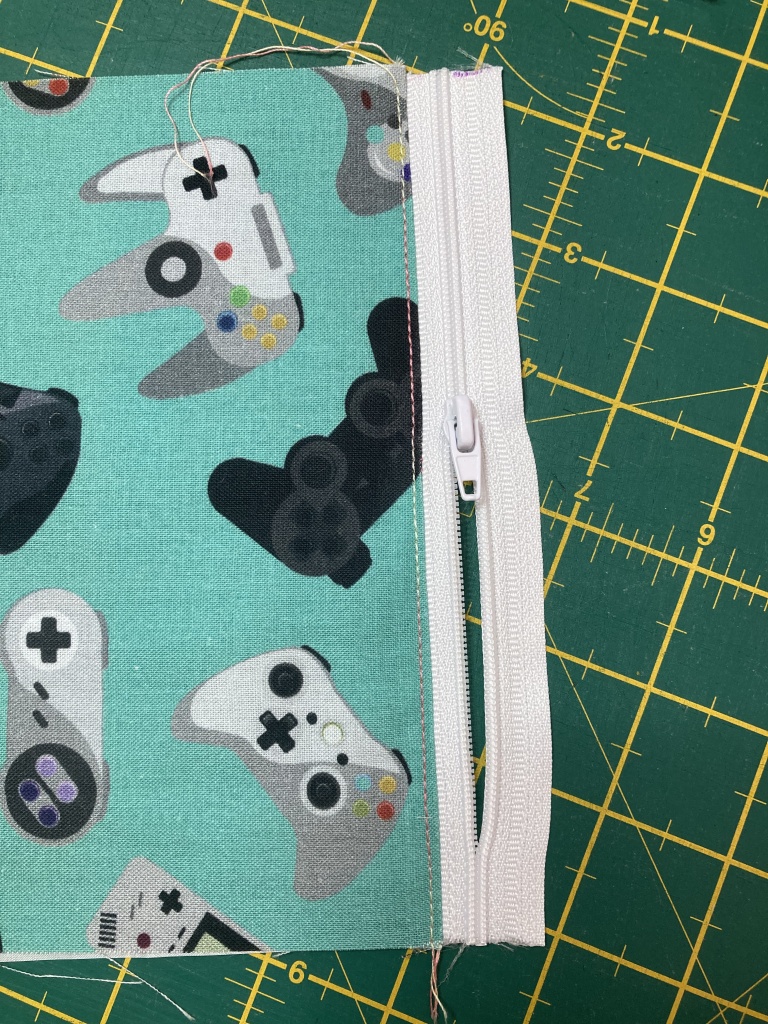
Once you have done this, flip both the outer and lining pieces back on themselves so they are right sides out. Do a top stitch next to zip to tack everything down.
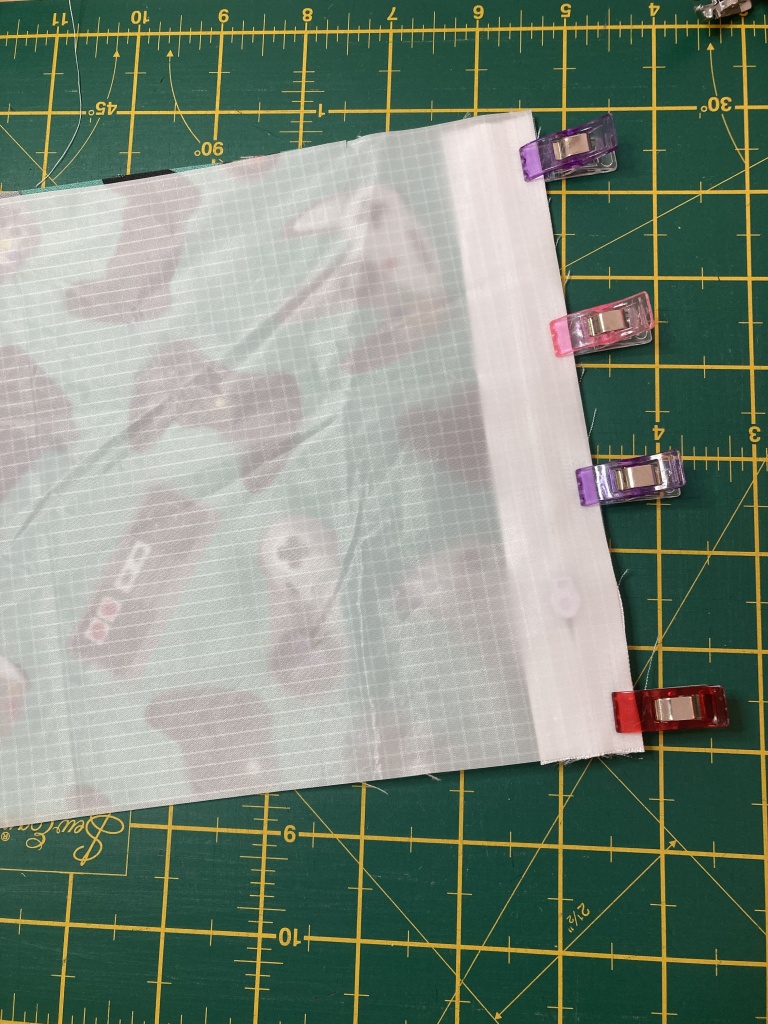
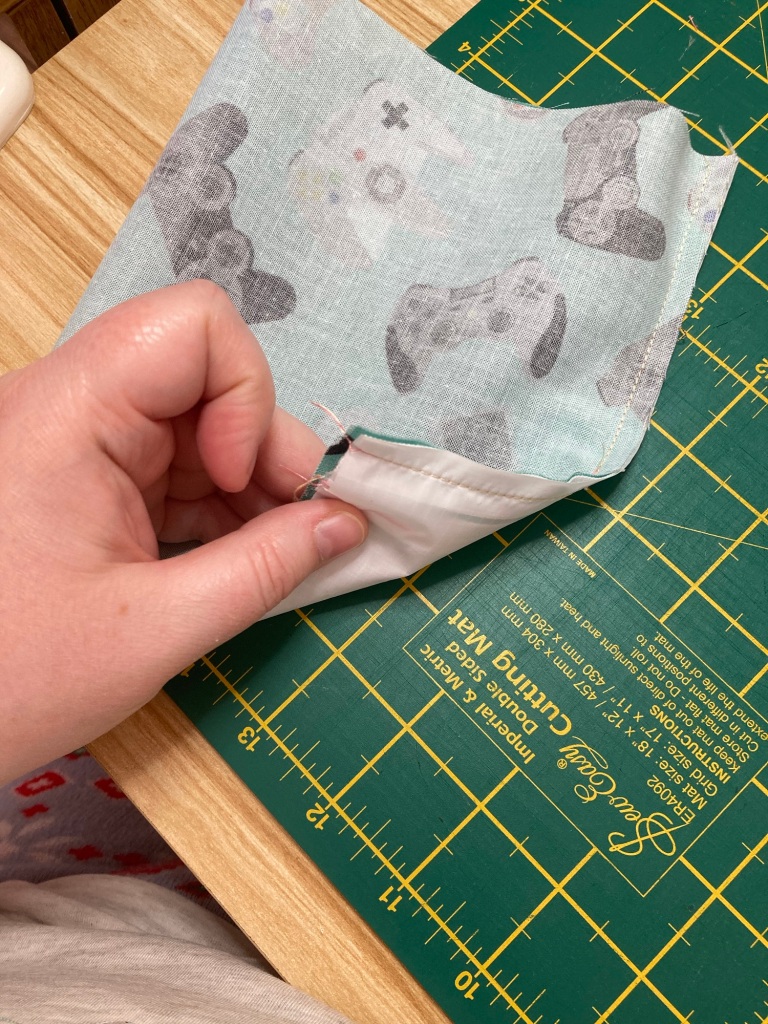
Next you are going to do the same to the other side of the zip. A bit more difficult as you have one side already attached. Just fold both pieces on top of themselves to reach the other side of the zip. Attach the lining with an 1/8th of an inch seam and then the outer fabric with a 1/4 inch seam. Remember the zip should be sandwiched between your outer and lining pieces. Carefully turn your piece right sides out. Then do a top stitch along that side of the zip. Check the photos to make sure yours look the same as mine.
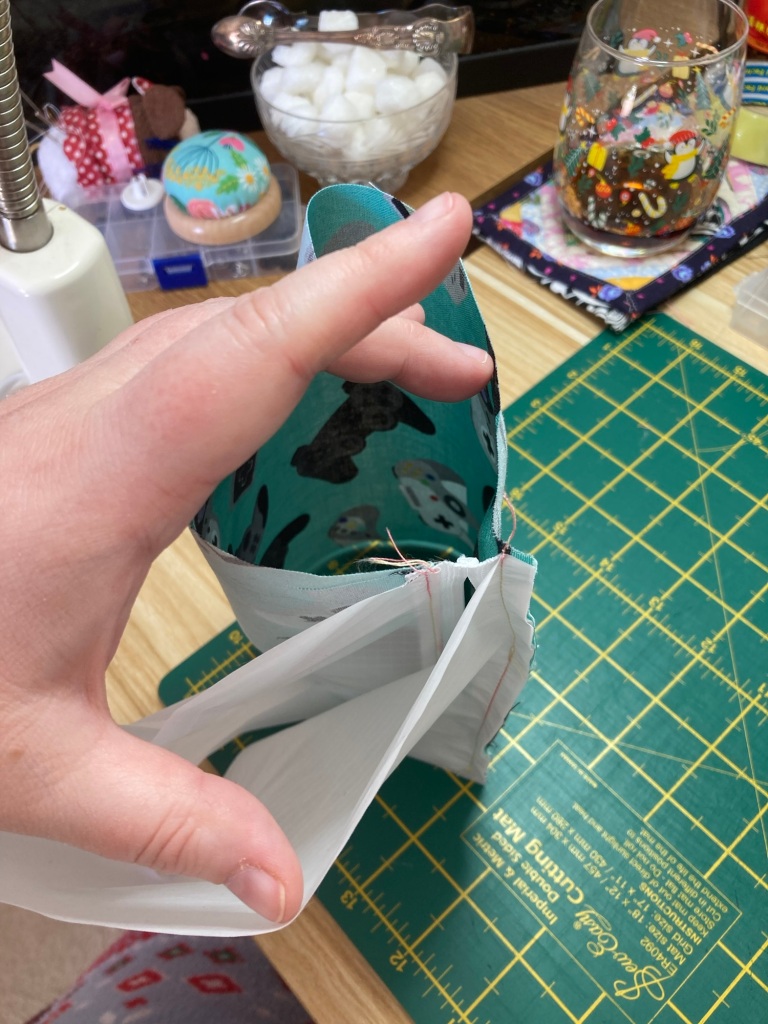

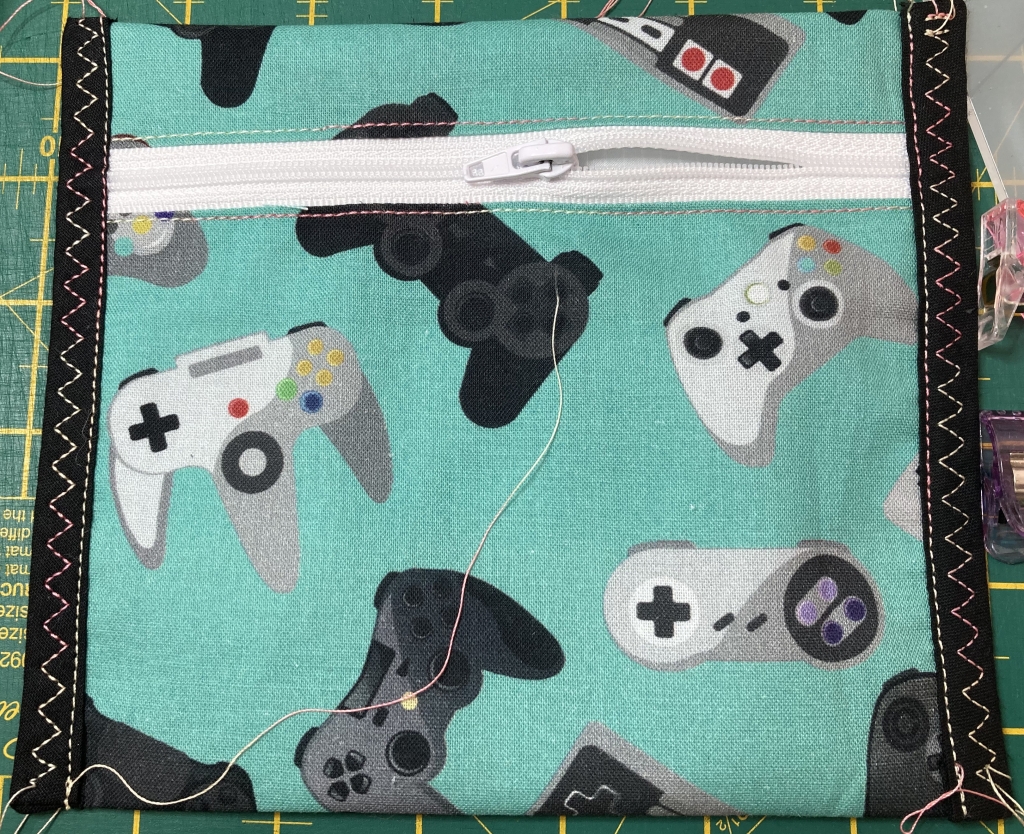
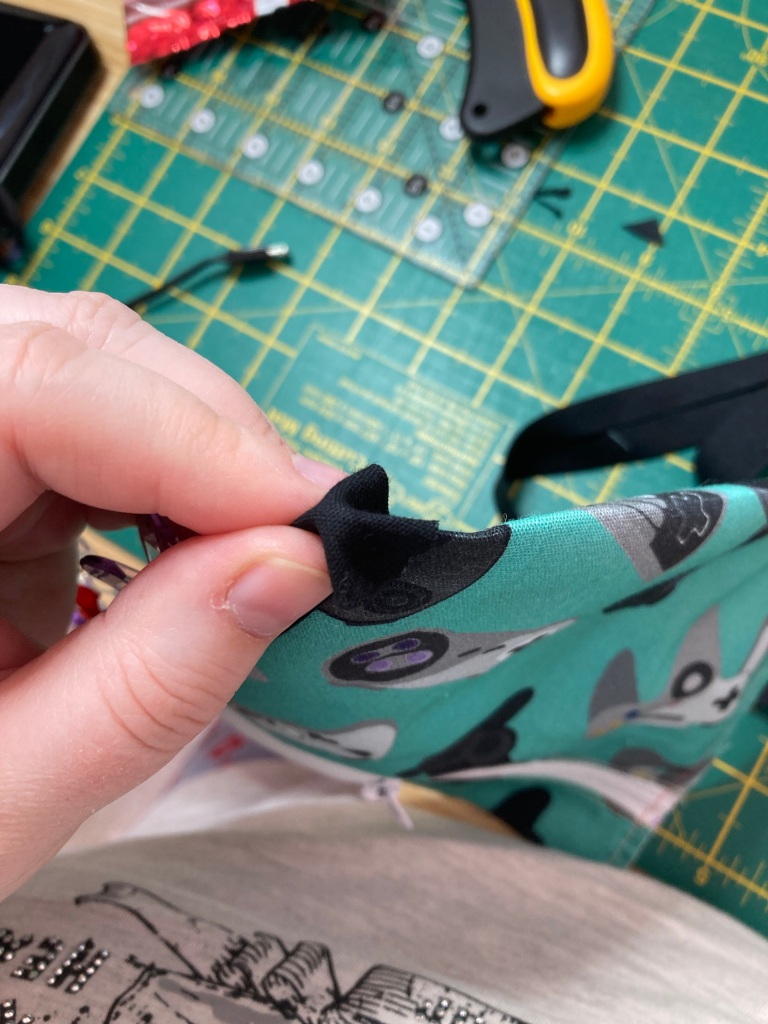
Decide how far up you want your zip to lie on the front of your piece. Mine is about 3/4 of an inch down. Make a mark where your pouch should fold if you are struggling to line it up nicely. Then use some clips to hold the sides together. We are going to go down both sides with a 1/8 inch seam. trim beforehand if necessary.


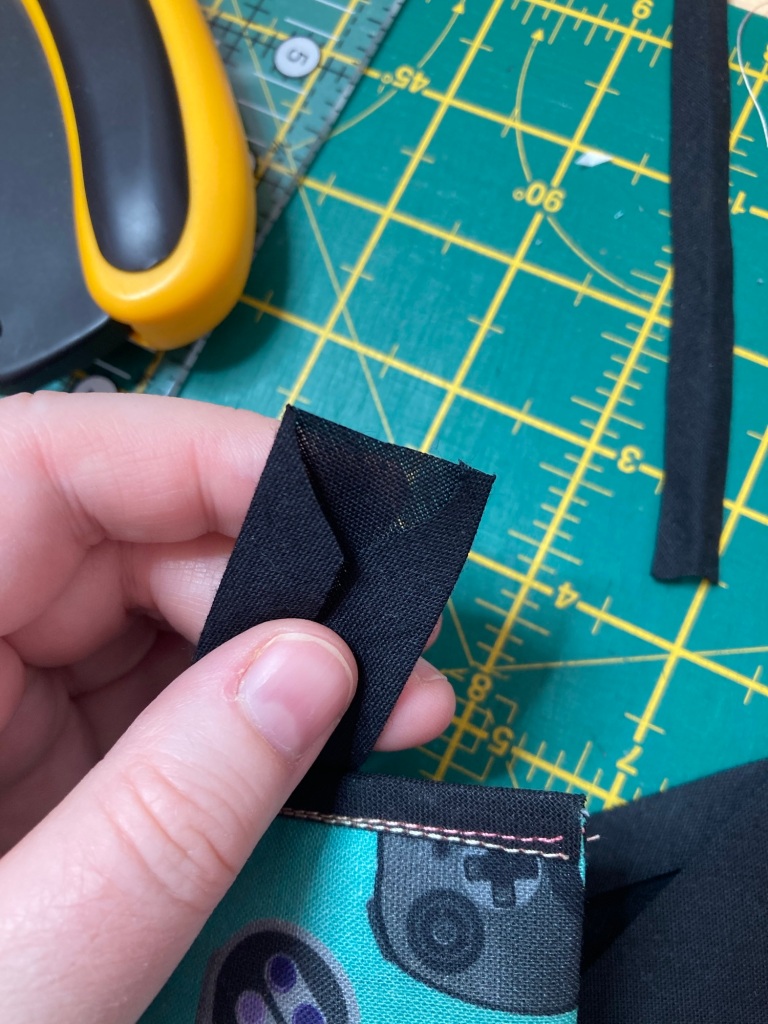
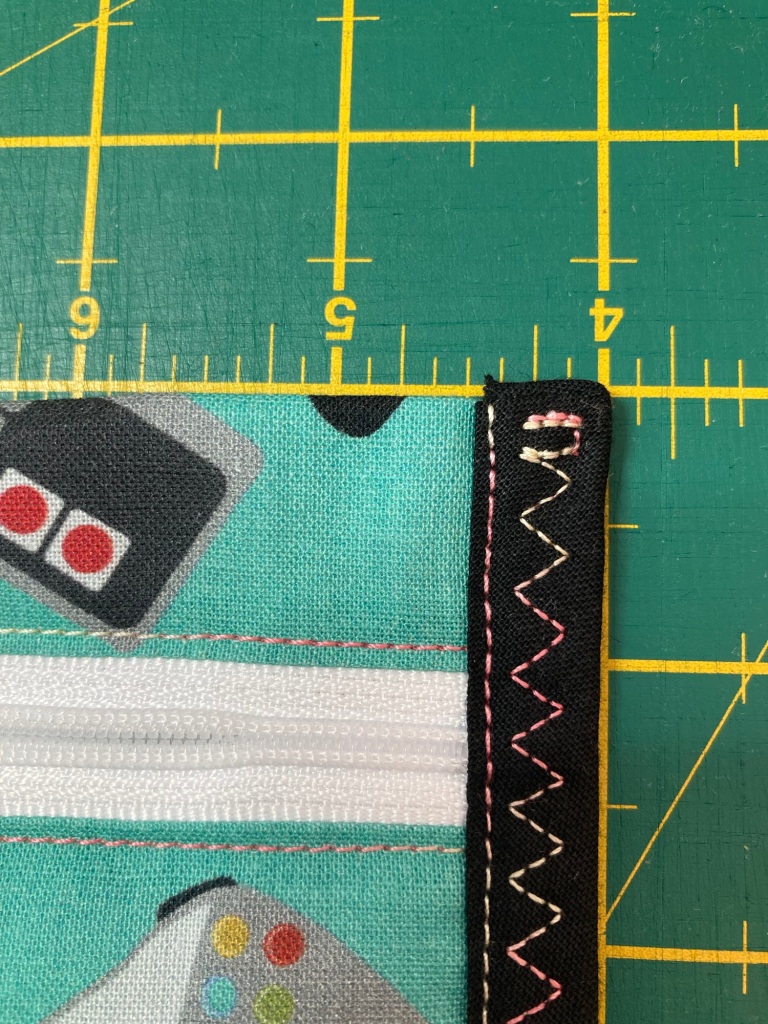
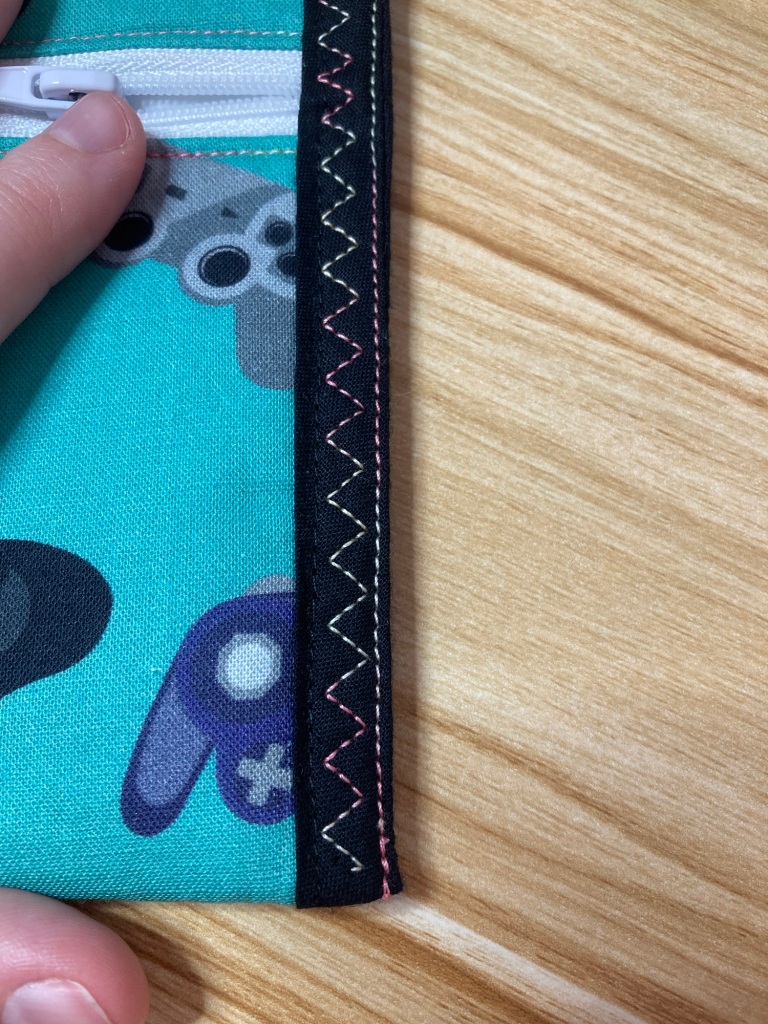
Now we are going to bind the sides. I’m using black as a contrast so I can add a fancy stitch later for a bit of interest. Measure the sides and add about 1/2 to 3/4 of an inch so we have an overlap for the top and bottom. I folded my bias binding over the long edge, leaving an overlap on the top and bottom and clipped. Then I folded the top over the top edge, then fold down flat. Then stitch down the edge of the binding. I recommend using a matching colour to start with so you don’t have to worry so much about it being straight. You can add accent stitching after. as you can see I didn’t quite catch the end so had to go back and add some more stitching, which would have been much easier in black!


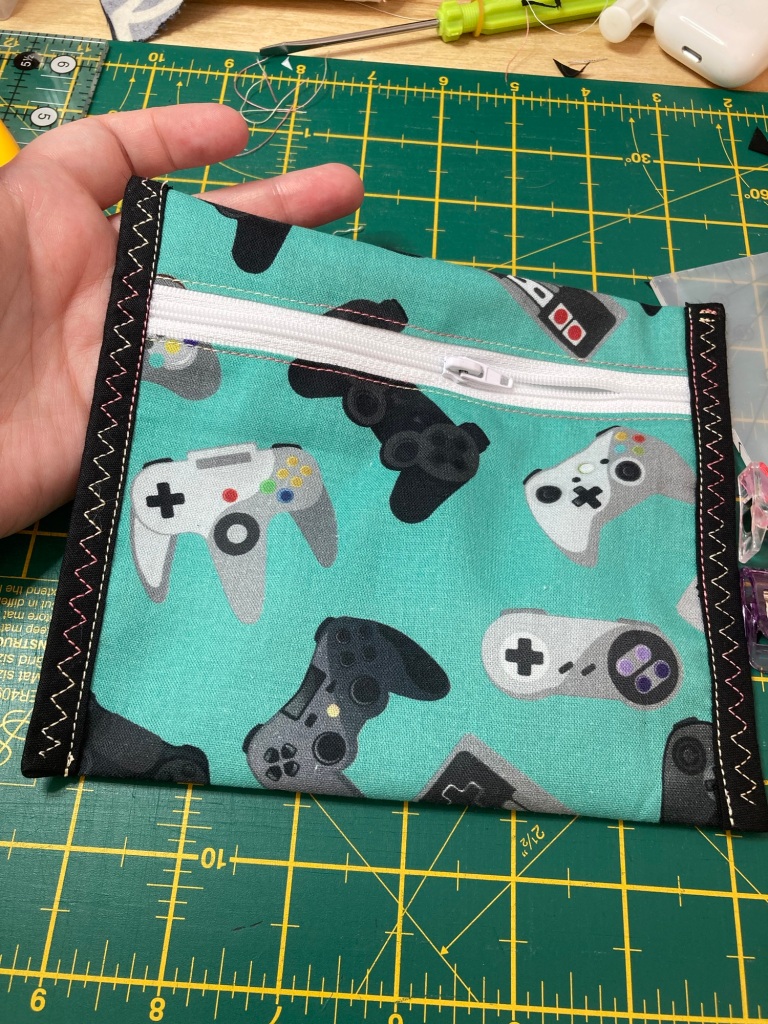
Now we are done! You can add some accent stitching if you fancy, I added some zig zags which I thought looked quite snazzy. we are going to ignore the bit I messed up, I joined it up so no one will notice!

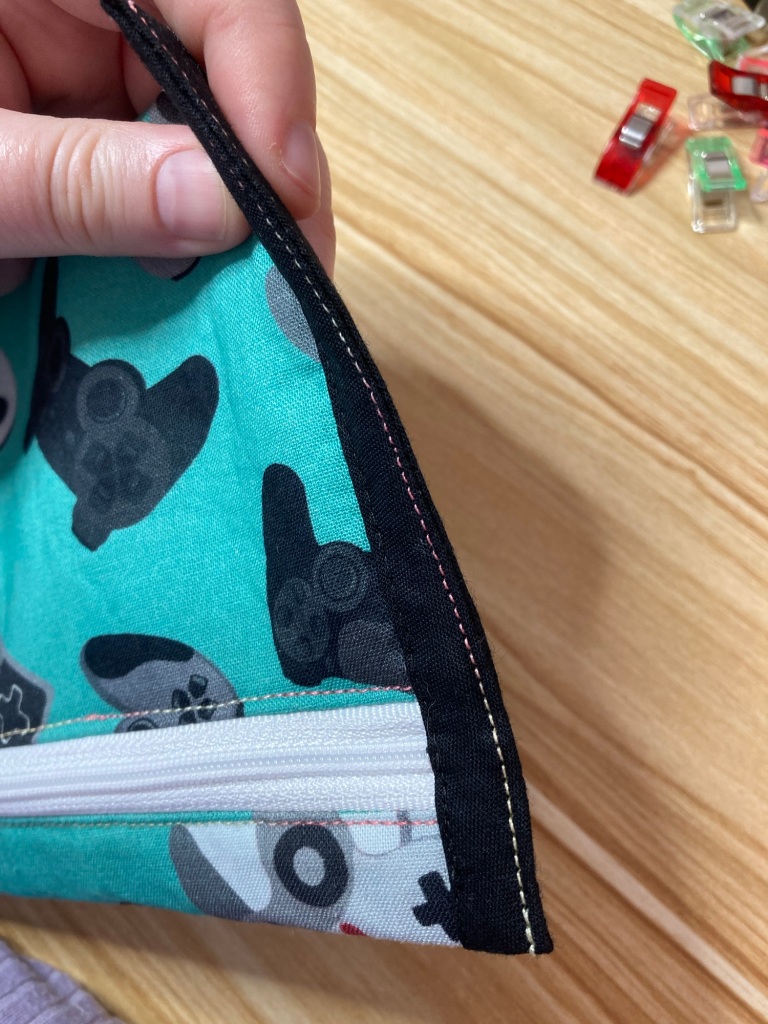
After I finished I tried another method of binding to see if it was neater, not sure which way I prefer. You could bind the edge as a cylinder and then sew down the sides. I measured the length of the pouch sides, then added half an inch. I sewed the binding short edges together with a 1/4 inch seam and then bound in one go round the side. Once I finished I sewed right down the outer edge and then did my extra stitching.


Happy sewing!!


Leave a comment